


Development
First of all we need to install Splunk Add-on builder.
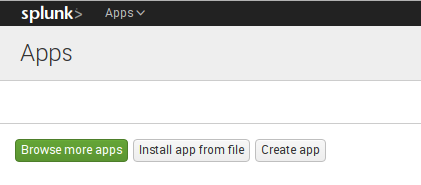
I prefer to install it from internal splunk shop in Splunk Enterprise.
Go to Manage Apps and click Browse more apps
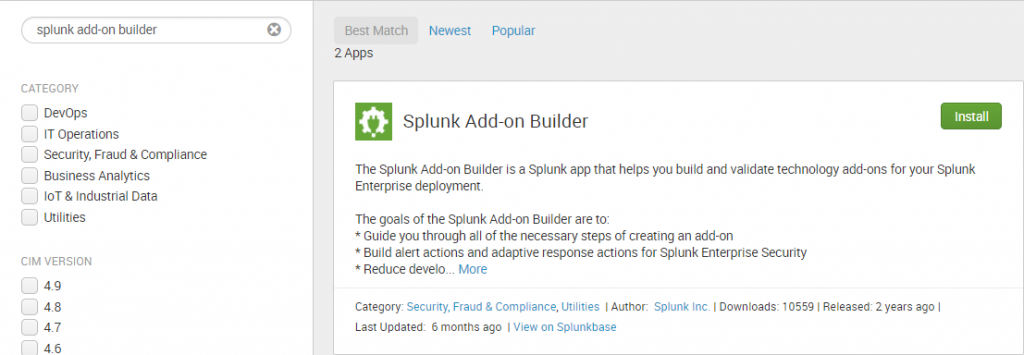
Use “Search” to find this. Then click Install buttton.
Add-on creating process
- Open the Splunk Add-on Builder
- On the top right corner select “New Add-on”
- Fill in the information in the fields and click “Create”

Manage Source Types
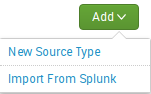
We can create a new sourcetype or import an existing one from Splunk. To create a new sourcetype on the add-on homepage select “Manage Source Types” -> Add -> New Source Type

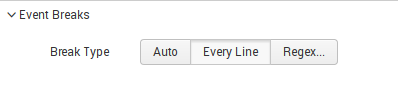
Configuring Event Breaks
Auto: automatical event breaks(already based on timestamp location detection)
Every line: every new line is one event
Regex: use regex pattern for event breaks
In our add-on we use “Every line” break, because in our case every line is one event.
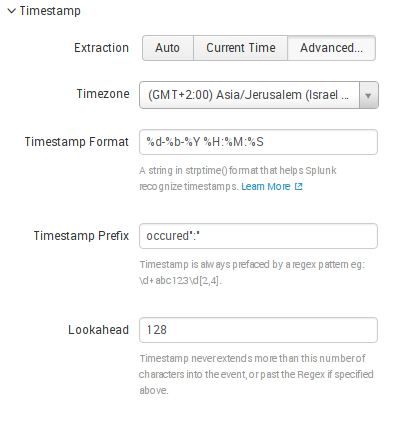
Configuring timestamps
Extraction:
- Auto: automatically extract timestamp
- Current time: use current Splunk host`s time for timestamp
- Advanced: custom timezone extraction using different parameters
- Timezone: preferred timezome
- Timestamp format: string to recognize time format
- Timestamp prefix: always it is regex pattern
- Lookahead: number of characters for timestamp length in even
Log event example:
Dec 1 17:06:48 127.0.0.1 1 2017-12-01T17:08:02.396Z PC17 – – {“event_type”:”Threat_Event”,”ipv4″:”127.0.0.1″,”hostname”:”pc17.lab.local”,”occured”:”01-Dec-2017 15:27:12″,”severity”:”Critical”,”threat_type”:”potentially unsafe application”,”threat_name”:”Win32/HackKMS.Q”,”threat_flags”:”Variant”,”scanner_id”:”Real-time file system protection”,”scan_id”:”virlog.dat”,”engine_version”:”16501 (20171201)”,”object_type”:”file”,”object_uri”:”file:///E:/KMSAuto.exe/”,”threat_handled”:false,”need_restart”:false,”username”:”LAB\\labuser”,”processname”:”C:\\Windows\\explorer.exe”,”circumstances”:”Event occurred during an attempt to access the file.”,”hash”:”J0D2J30H4J232DJ2GDXM123X1MU03XDec 1 17:06:48 127.0.0.1 1 2017-12-01T17:08:02.396Z PC17 – –{“event_type”:”Threat_Event”,”ipv4″:”127.0.0.1″,”hostname”:”pc17.lab.local”,”occured”:”01-Dec-2017 15:27:12″,”severity”:”Critical”,”threat_type”:”potentially unsafe application”,”threat_name”:”Win32/HackKMS.Q”,”threat_flags”:”Variant”,”scanner_id”:”Real-time file system protection”,”scan_id”:”virlog.dat”,”engine_version”:”16501 (20171201)”,”object_type”:”file”,”object_uri”:”file:///E:/KMSAuto.exe/”,”threat_handled”:false,”need_restart”:false,”username”:”LAB\\labuser”,”processname”:”C:\\Windows\\explorer.exe”,”circumstances”:”Event occurred during an attempt to access the file.”,”hash”:”J0D2J30H4J232DJ2GDXM123X1MU03XM1MX0″}First part doesn’t have any useful information for us, because the timestamp may be extracted from the “occured” field, host name from the “hostname” field etc.
For our add-on we need to use only the second part of the logs. It’s easy for field extraction using data format – JSON.
To extract timestamp from our raw data, we need to define Timestamp Prefix and Timestamp Format.
Here are our configurations for the timestamp(Advanced extraction)
Advanced configurations
In this configuration block you can specify additional parameters for parsing data.
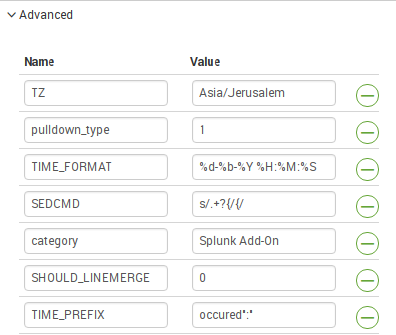
We are interested in the SEDCMD parameter.
It is “used to specify a sed script which Splunk applies to the _raw field. A sed script is a space-separated list of sed commands.”
Now we have completed the sourcetype configuration. Next we will upload sample data and check how it works.

Click Save to save all changes
Fields extraction
Splunk Add-on builder has 3 ways to extract fields:
- Assisted extraction – JSON, XML, Key Value, Table or Unstructed Data. Splunk parses the text and automatically extracts it.
- Manual Extraction – configure your field extraction manually
- Manual Transformations – configure the field transformations manually.

We use Assisted Extraction, because our data is in JSON format.
Select Assisted Extraction -> JSON and click Submit
Here you can see successful or unsuccessful field extraction

If all is good, click Save
Parsed format now is changed to JSON
DataModel Mapping
This is a very important step in the add-on development process.
Select Map to Data Models on the main page of your add-on and go to New Data Model Mapping
Next we need to create an event type.

Name for the event type – is a categorization system to help you make sense of your data. Event types let you sift through huge amounts of data, find similar patterns, and create alerts and reports.
Select one or more source types – select your sourcetype (in our case it is “eset:ra”)
Click Save
After this you need to map fields to the data model.
Click on the “Select Data Model”

Then select Data model. In our case it will be Malware and Dataset “Malware Attacks”. Select it.
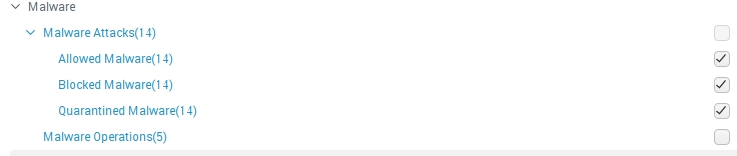
To map fields in the data model you need rename it relative to requirements listed here
https://docs.splunk.com/Documentation/CIM/4.9.1/User/Malware
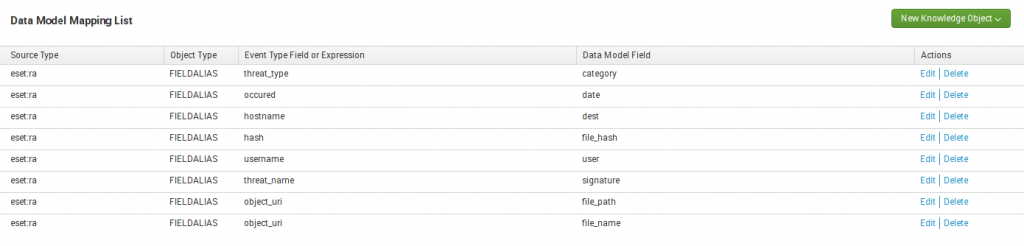
Click New Knowledge Object -> Fieldalias
Mapping process: select event type field from left panel then select Data Model Field from Right panel relative to requirements in splunk documentations and click OK(for example: Event Type for field fobject_uri we can create alias in Data Model as field file_path.
Validate and package
We can validate our add-on against Splunk best practices and other rules to check if your app is ready for Splunk Certification.
Go to Validate&Package and click Validate
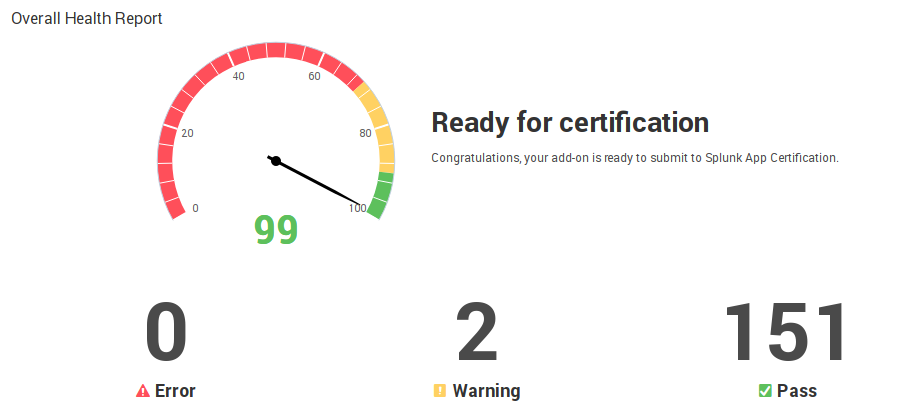
We have some Warnings, but the add-on is ready for certification.
To download add-on package click Download Package button.
How to use it
Configuring Splunk for getting data in
To get logs we need to listen for incoming data on a specific port
Go to Data Inputs and add new listening on UDP port
Port: port to listen on (in our case it will be 590)
Source name override: fill this field in if you want to override default source value
Only accept connection from: whitelisted ip`s or hostnames
In Input Settings you need to configure Source Type, App Context, Host value and Index
Sourcetype: type of source for incoming data. You should select eset:ra. It is preconfigured and provided by add-on sourcetype.
Host: use IP or DNS as Host field or configure Custom value
Index: we recommend to send your logs into a new index, like an “eset” or other value
Click Review, verify your configs and click Submit
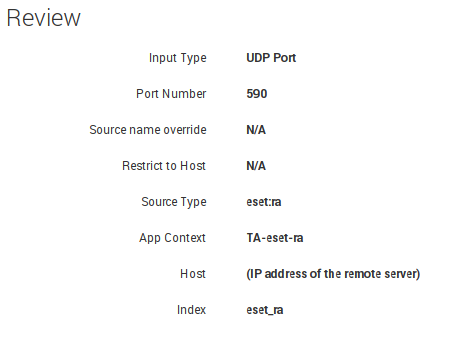
How to search:
To see all logs you can search it by index using command: “index=eset_ra”
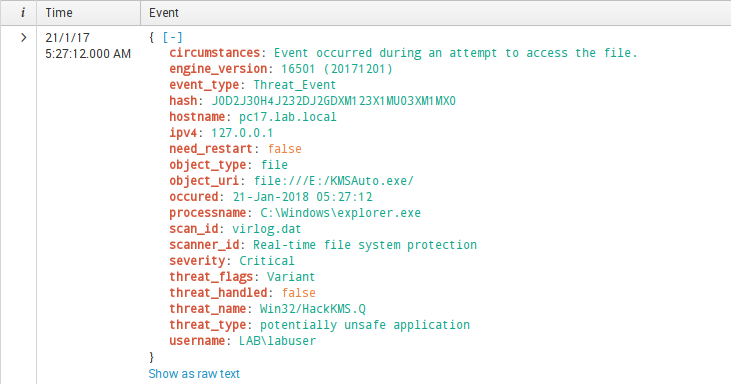
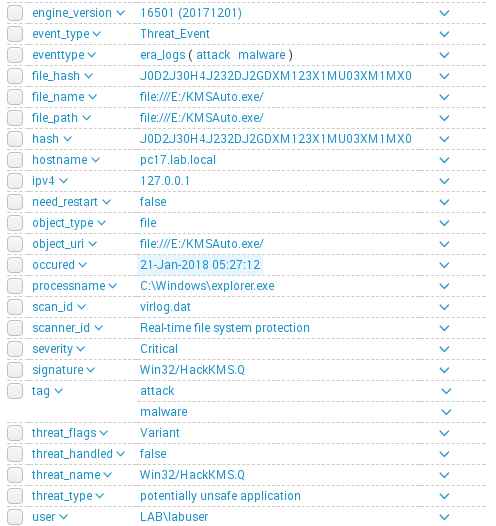
Checking fields extraction:
Checking data model mapping:
We can do this using Pivot.
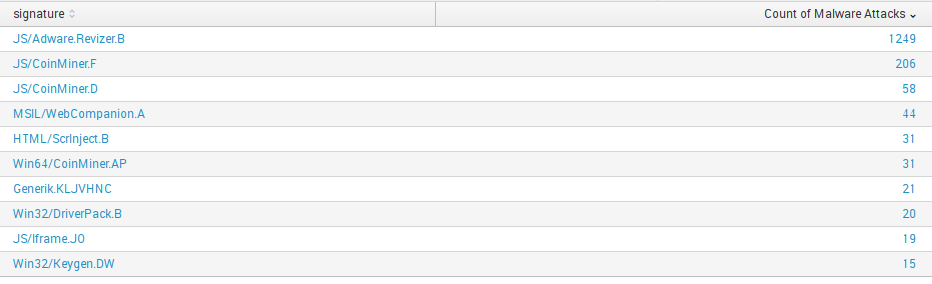
This screenshot is with our production data, so we can display only insensitive. As you can see, data model mapping works well.
Summary
In this article we described the development process of Splunk Technology Add-On for Eset Remote Administrator from the creation of a project in Add-On Builder to the validation and checking for certification.
Big thanks to Splunk for the great resources they provide. Special thanks to portal answers.splunk.com for answering the questions, which arose in the process of developing this TA.