


- How to use msiexec on remote hosts?
- Description of the situation in the environment
- How do we delegate credentials?
- Application installation
- Summary
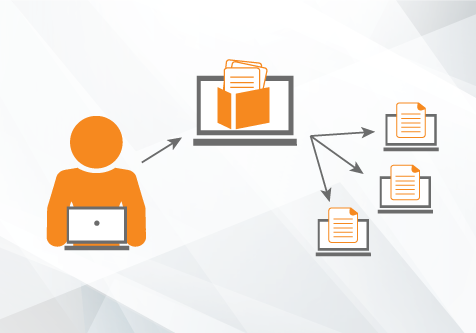
Very often we come across the challenge of deploying software in enterprise infrastructures. An example of a great solution to this problem is to go with a flash drive from host to host and install the necessary software manually. However there is a more simple way to perform these actions remotely.

Short story and the instrumentation rights and wrongs
Not too long ago we came across a challenge with deploying remote msi files in windows infrastructure. Not the most complex challenge you could say, only using Group policy. But in continuous development we discovered that we need to add keys according to the installation. It is possible, to can use Group Policy for this, firstly recompile .msi to .mst files with necessary keys using Orca, and then deploy a .mst file via group policy. But the task was really urgent and that’s why we divided into several teams and began to research this question. The first option was to use psexec to remotely deploy .msi files with specific keys. However using psexec is not a secure approach, as executing PSTools in infrastructure provides an additional attack surface, and there are many malware samples using it for their own. That’s why many companies blocked ports and protocols which utilize pstools. In our case we met this situation when the psexec were blocked in the clients infrastructure. In this case we tried other possibilities to use .mst and GPO. We started to recompile .msi with necessary keys using Orca. After this we received samples but no one had installed these properly. As we haven’t had a possibility to use psexec, we focus on msi.exe. This is the Windows installer technology for installing MSI and MSP packages. This tool gives full control over the installation process.
How to use msiexec on remote hosts?
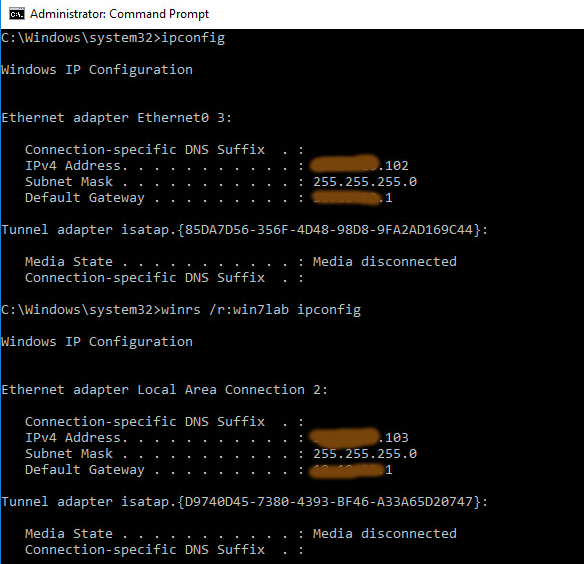
Next, we chose the installation instrument (msiexec in our case), we met another problem, such as how to share .msi file to all of the computers, and how to run msiexec on other computers. Here we’d like to describe our resolution: We focused on Windows Remote Management tools, which firstly appear in Windows Vista, and Windows Server 2008. Below we describe a solution which we applied. Windows RM – Windows Remote Management is one component of the Windows Hardware Management features that manage server hardware locally and remotely. It’s a Microsoft implementation of WS-Management protocol which based on SOAP. The WS-Management protocol was developed by a group of hardware and software manufacturers as a public standard for remotely exchanging management data with any computer device that implements the protocol. During the use of the WinRM service you can use several components, such as WinRM scripting objects, the WinRM command-line tool, or the Windows Remote Shell command line tool WinRS to obtain management data from local and remote computers that may have baseboard management controllers (BMCs), the management data is supplied by Windows Management Instrumentation (WMI). You can find out all components with description here. Data returned to WS-Management protocol are formatted in XML rather than in objects. The using winRM in Windows XP or Windows Server 2003 require an additional installation. In the process of resolving this issue we focused on WinRS.exe. This command line tool enables administrators to remotely execute most Cmd.exe commands using the WS-Management protocol. How to start and configure WinRM services: we describe in the article – “Windows Event Collector orchestration 2“. After configuration WinRM services (server and listeners) we try to execute some commands on a remote computer. As we can see in the picture below, it was successful.
Description of the situation in the environment
As we create a shared folder which is accessible only for admins we start thinking about how we can get access to this folder from users hosts through WinRS. Imagine a group of computers as shown here where you establish a remote session from Admin PC to User PC and then from User PC, you try to access a file in a file share on the Server. Now, within the remote session to User PC, we want to execute a command — as below — to read any files in shared folders on the server.

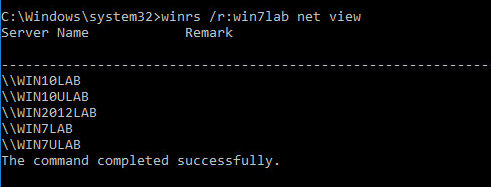
We tried to observe shared folders through WinRS and we received the following results. We successfully gained access to overview network places.
But unfortunately when we try to get access to a shared folder on the remote computer we received the message “Access Denied”.

This command failed since the remote session tried to access the file share using the User PC credentials instead of the credentials used to invoke the remote session (Admin PC credentials). We could have successfully accessed the files in share folders if there was a way to pass or delegate credentials from the Admin PC so that we can authenticate to the file share. This is what is called multi-hop authentication using CredSSP.
How do we delegate credentials?
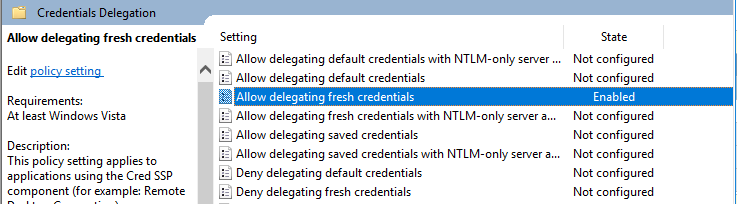
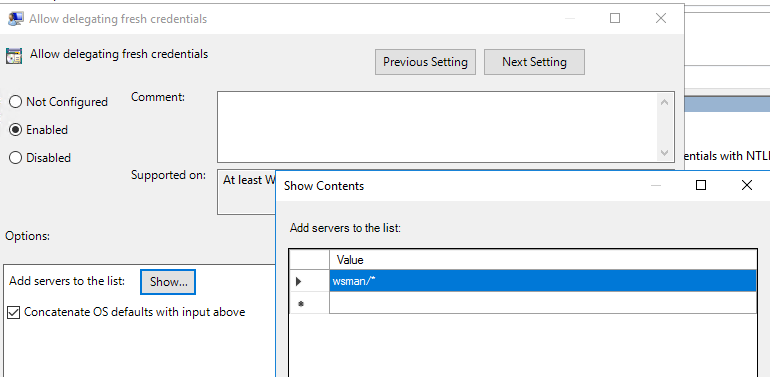
There is a great possibility to do this via GPO in Windows infrastructure. First of all we configured “Allow delegating fresh credentials policy”. To do this on Domain Controller in the GPO editor we went to the Computer Configuration -> Policies -> Administrative Templates -> System/Credentials Delegation and enabled this policy.
The “Allow Delegating Fresh Credentials policy” setting must be enabled on the WinRM client, and a Service Principal Name (SPN) with the WSMAN prefix must be added to the policy. The SPN represents the target computer to which the user credentials can be delegated. The SPN can be set to one or more computers. wsman/* – the parameter allows delegation of credentials to all computer in domain.
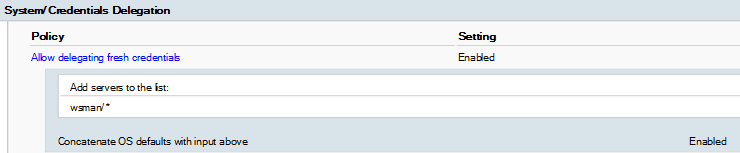
And finally configured policy will look as such in picture below.
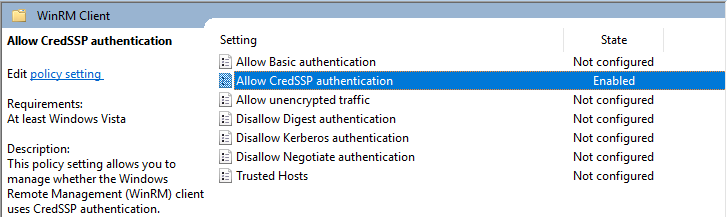
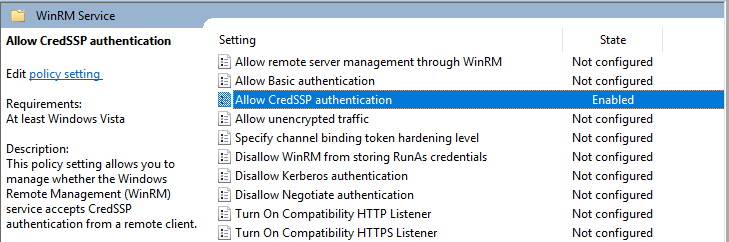
The next step was allow CredSSP Authentication for WinRM Service and Client. To actualize these steps we configured the following policies:
- Computer Configuration -> Policies -> Administrative Templates -> Windows Components/Windows Remote Management (WinRM)/WinRM Client
2. Computer Configuration -> Policies -> Administrative Templates -> Windows Components/Windows Remote Management (WinRM)/WinRM Service
Upon implementing these policies we received the following result:


Let’s test if we can access files in the shared folder.
Use this command: winrs /r: /ad /u:”” /p:”” dir \\\\\\
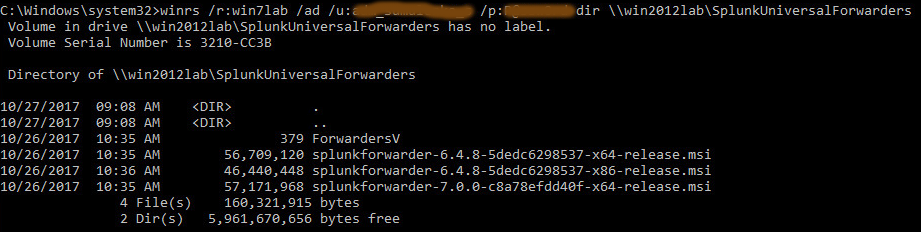
Woohoo! As we can see, we get access to this folder.
Application installation
So finally we are ready to install the necessary software on the remote host using WinRS. To accomplish this we used the command: (for example we install Splunk universal forwarder which require additional keys during the installation): winrs /r: /ad /u:”” /p:”” msiexec /i \\\\Path\\to\\Installation\\File.msi KEY_1=”Value” KEY_2=Value KEY_3=Value /passive

Check if the application has been installed.
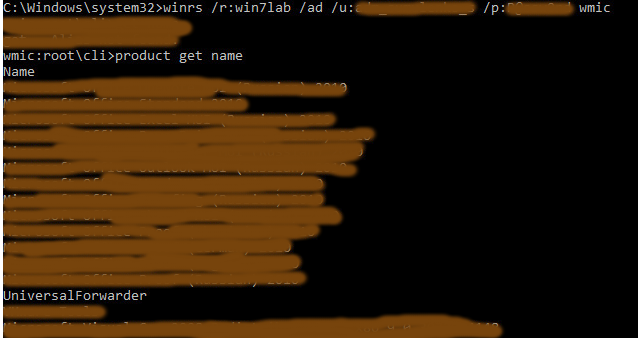
We do this with Windows Management Instrumentation console.
Summary
Here we described how to deploy .msi packages with pre-installation keys in a remote manner. We used Windows Remote Management tools for this task, specifically Windows Remote Shell. The important part of this article is about how to configure multi-hop authentication using CredSSP (Credential Delegations).